
When you’re building a prioritization, items can be added individually or via bulk CSV import.
View our quick video tutorial about adding items manually, or read on for step-by-step instructions.
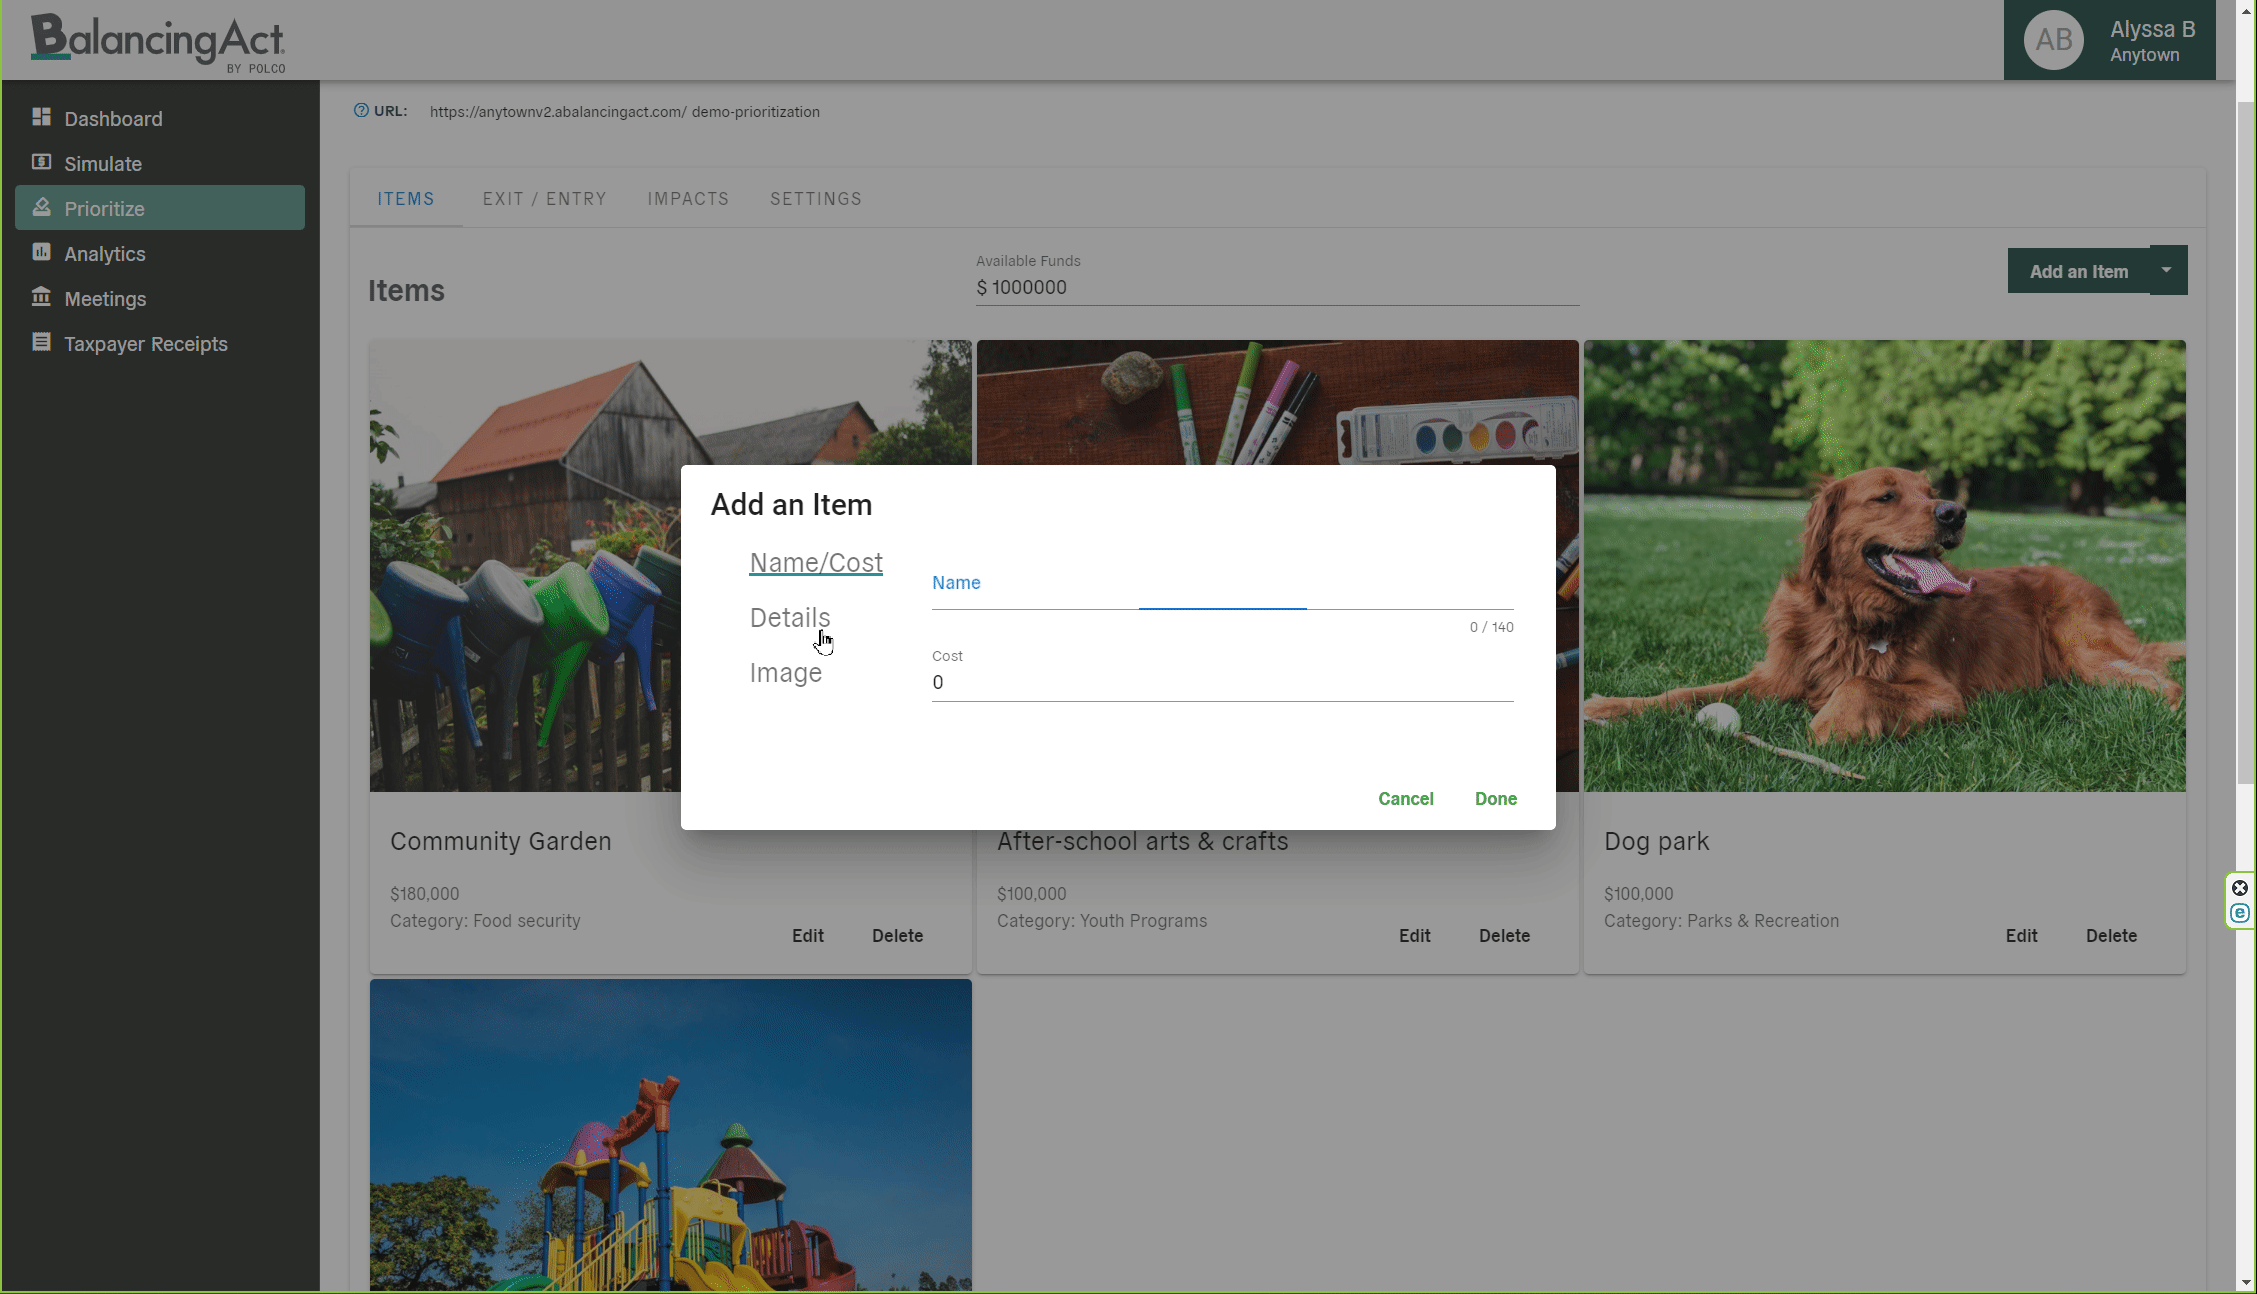
To add an item manually, first click “Add an Item” within your existing Prioritize project.
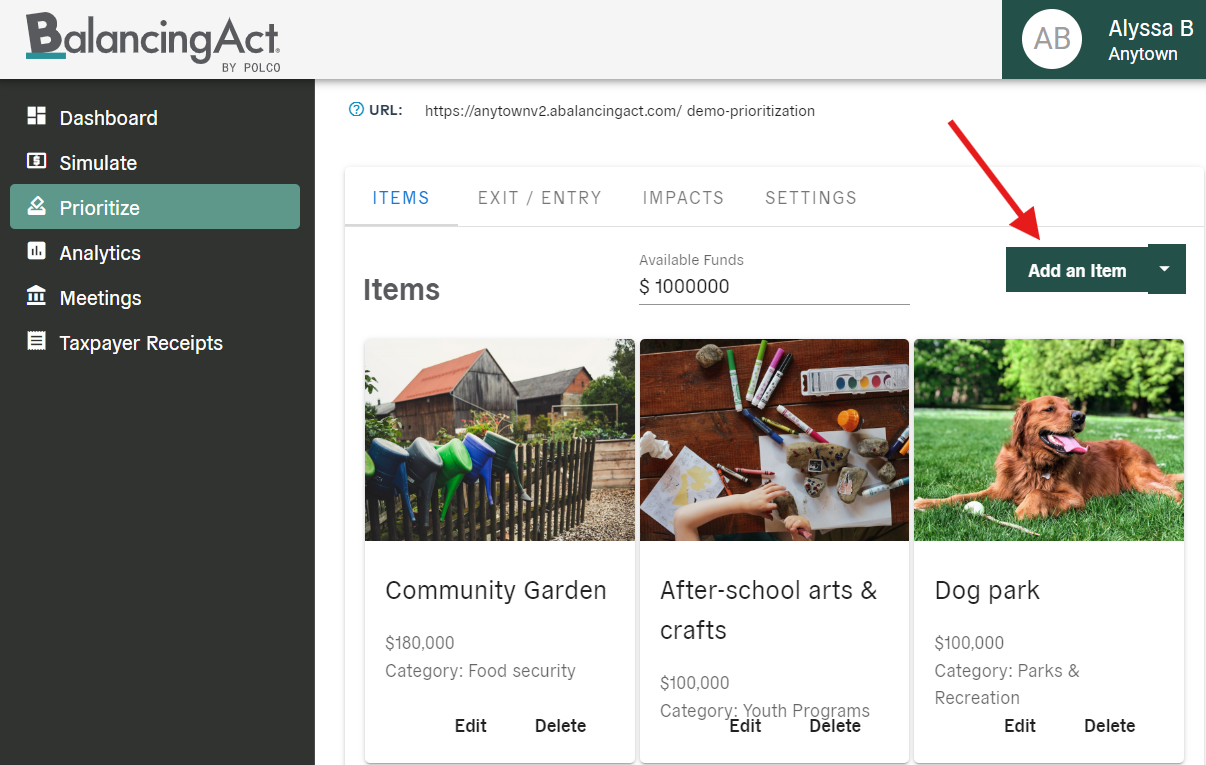
A window will appear with several information fields. The "Name” and “Cost" are technically the only fields required, but to make your Prioritization more informative and visually inviting, we recommend also adding details and an image.
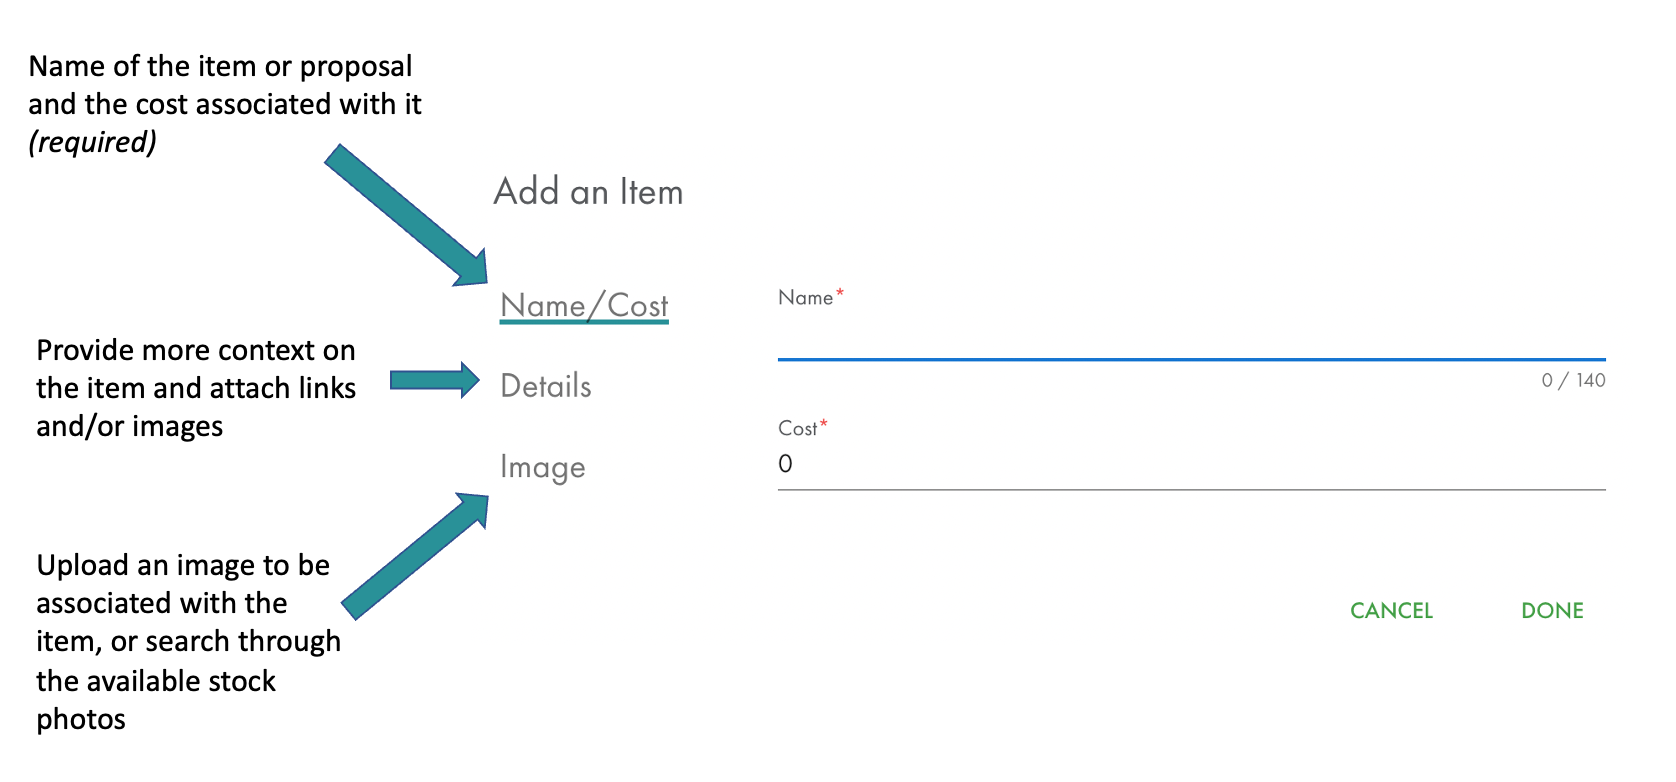
When you click the "Details" tab on the left, you’ll have the opportunity to assign a category (either select an already-existing category or add a new one).
You can also optionally fill in the fields for “Details” (brief explanation of the item and/or what it includes) and “More Details” (additional in-depth background or context with hyperlinks, embedded media, and special formatting if desired).
Finally, click the “Image” tab and choose whether to upload your own image or search for a free stock photo. When you’re finished, click “Done” to officially add that item to your Prioritize. If you’d like to reorganize item cards, you can simply click, drag, and drop any item to its new location.