Caution! Editing a project after activation could overwrite data. Consider making a duplicate of your simulation before attempting to edit a live simulation.
On occasion, you may need to edit a simulation after activation. While it can certainly be done, we recommend taking care to avoid accidentally overwriting information in the process. Read on for an explanation of how to edit a live simulation, both manually and via CSV re-import, and considerations for each.
Editing Manually
Within the Simulations section on the left-hand sidebar, select the active project and click on the edit icon. This will open the simulation for editing. This will make immediate changes to the live simulation, which your users will see once they refresh the page.

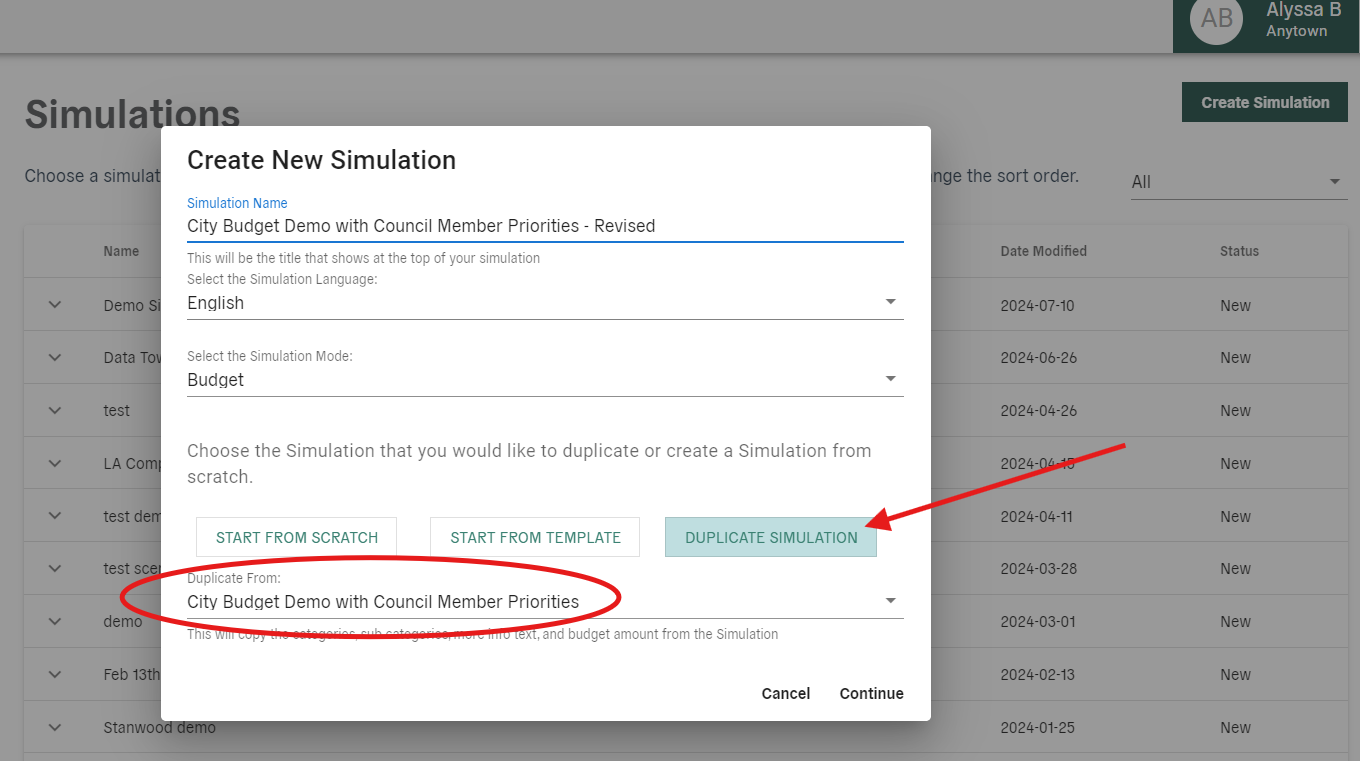
Alternatively, you can duplicate an existing simulation to be safe! Simply click the “Create Simulation” button, assign the new simulation a name, choose “Duplicate Simulation”, and select the appropriate project to duplicate.

Considerations
Editing text fields, including in the entry/exit modals and info icons, is safe. Feel free to fix typos or update messaging as you like!
However, if you make changes to monetary amounts, scenario question options, or the category/subcategory structure, the data shown in Analytics or the CSV download may be inconsistent. If you delete a category, subcategory, or question option, that data will be deleted as well.
If you need to make changes to these elements of the simulation, we advise you to duplicate the simulation, make your changes, deactivate the old simulation (with data intact), and then activate the new simulation.
Editing Content via CSV Import
You may want to edit your simulation using a CSV file rather than the full control panel, particularly if you:
- have a lot of new material to add
- want to make many revisions to an existing simulation
- want to update a certain type of data, such as amounts with new figures
- are searching for an error and want to see current information in a spreadsheet format
To use this feature, in the simulation module, scroll to the bottom of the Revenue or Spending tabs (or Housing Requirements/Housing Choices tabs, if a Housing simulation) and select "Bulk Edit". You will see two buttons:
- "Export to CSV" will download a CSV with the current content. Use this to view and revise existing material.
- "Re-import from CSV" will add or change the content in your simulation (see considerations below for details).
If you need a refresher on where each field within the CSV appears in the end product, check out this article.
Considerations
Your CSV re-import can either add completely new data or replace existing data.
Brand new data can be added for all five main information fields, and then further refined using the simulation control panel.
If your CSV contains exact matches for both the Category and Subcategory fields, any data you enter for the Amount, More Info, or More Details fields will be updated with the new values. If you leave one of those cells empty, it will erase that content on the simulation.
