
The Settings tab of your Prioritization has a number of features and functionalities to consider. Take a look at this video walkthrough or the written guide below for more information about each option.
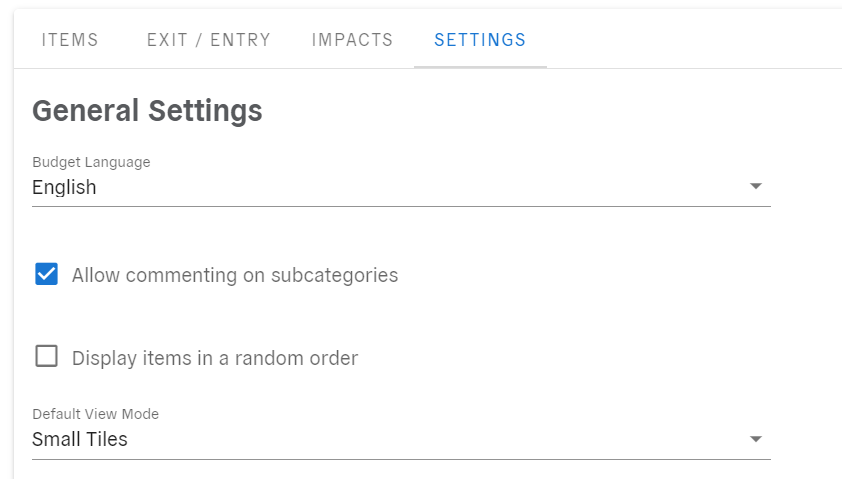
General Settings
You’ll first select your preferred language for the prioritization. Next, the following checkboxes can be toggled on or off to indicate 1) whether users can add comments on individual items, and 2) if item order should be randomized for viewers. The Default View Mode dropdown allows you to further customize the user experience, deciding if the items should display in small tiles, large tiles, or a list.
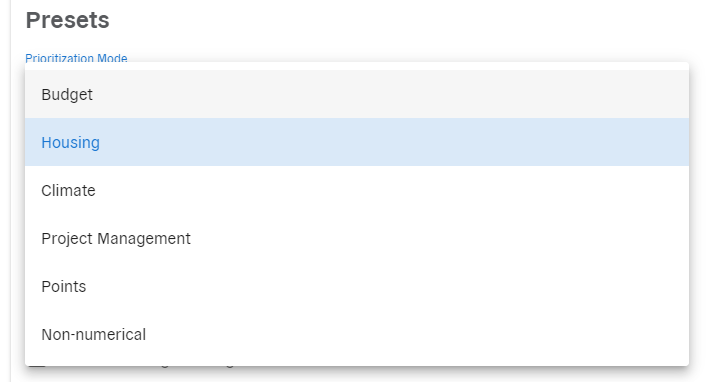
Presets
In this section, you can choose a prioritization mode (e.g., budget, housing, climate, etc.), which will automatically adjust other settings (such as balance bar behavior and units) accordingly.
Balance Bar Behavior
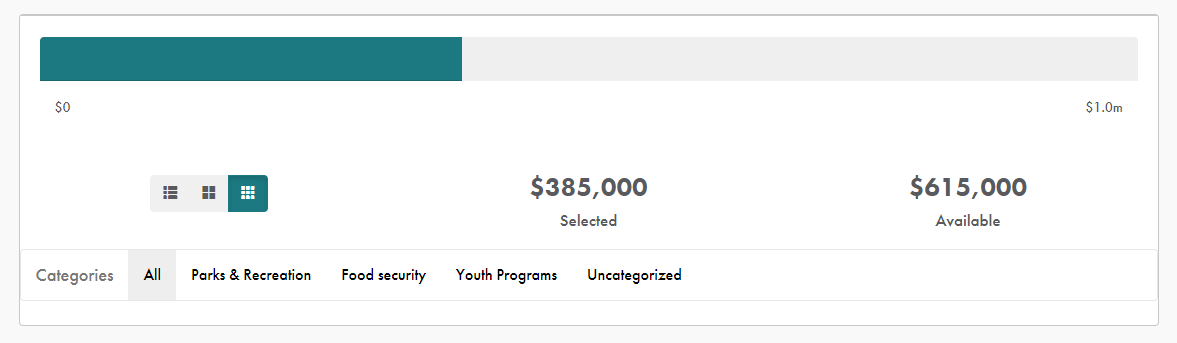
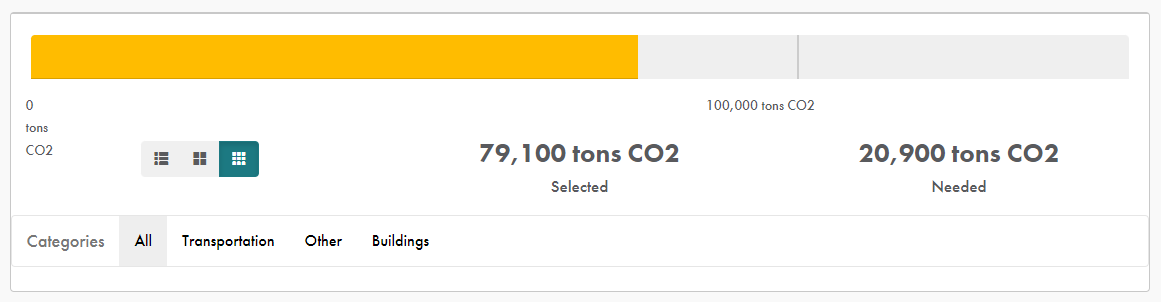
The balance bar behavior is an important setting, essentially determining the core functionality of your Prioritize project. In order for a user to submit their prioritization, they will need to either 1) meet or exceed the goal, or 2) be at or under the available amount. This choice impacts how the balance bar appears at the top of the page for users.
Be at or under the available amount
This balance bar setting is ideal when you have a set amount of funds for a project, and a user should not be able to go over that limit. Most budget, project management, and point allocation projects will use this setting.
Meet or exceed the goal
This balance bar setting is ideal when you have a minimum target number that must be met and the ability to go above the goal. Climate and housing prioritizations commonly use this setting.
When “Meet or exceed the goal” is selected, you’ll also have the ability to enable a few additional settings:
- Show confetti when goal is reached
- Show a message when goal is reached
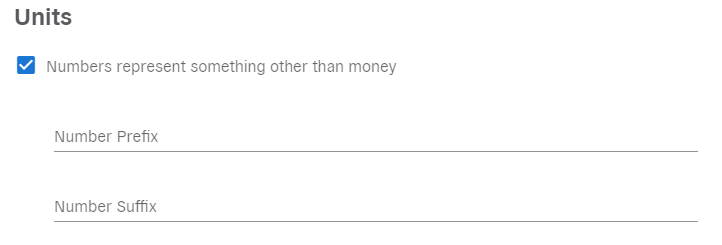
Units
This section allows you to change the units of your prioritization (e.g., housing units, tons of CO2, etc.). When you check the box beside “Numbers represent something other than money”, you’ll then see options to add a prefix and/or suffix to your numbers. These may autofill based on the preset selected, but you can customize the text as needed.
Advanced
Maximum Number of Items Users Can Select
In addition to the prioritization’s larger goal or cap, you can also limit the number of individual items users can select. This can further help identify top priorities for participants.
Google IDs
If you use Google Analytics, fill in these fields to better understand users’ engagement with your prioritization.
Text Customizations
Click the “Add Custom Text” button to see all the existing text strings in your prioritization. There, you can adjust any of the text to better meet your needs. For more info about text customizations, check out this article.
User Experience
Here’s an example of a housing-type prioritization as it appears to an end user, after selecting enough housing units to meet the goal:
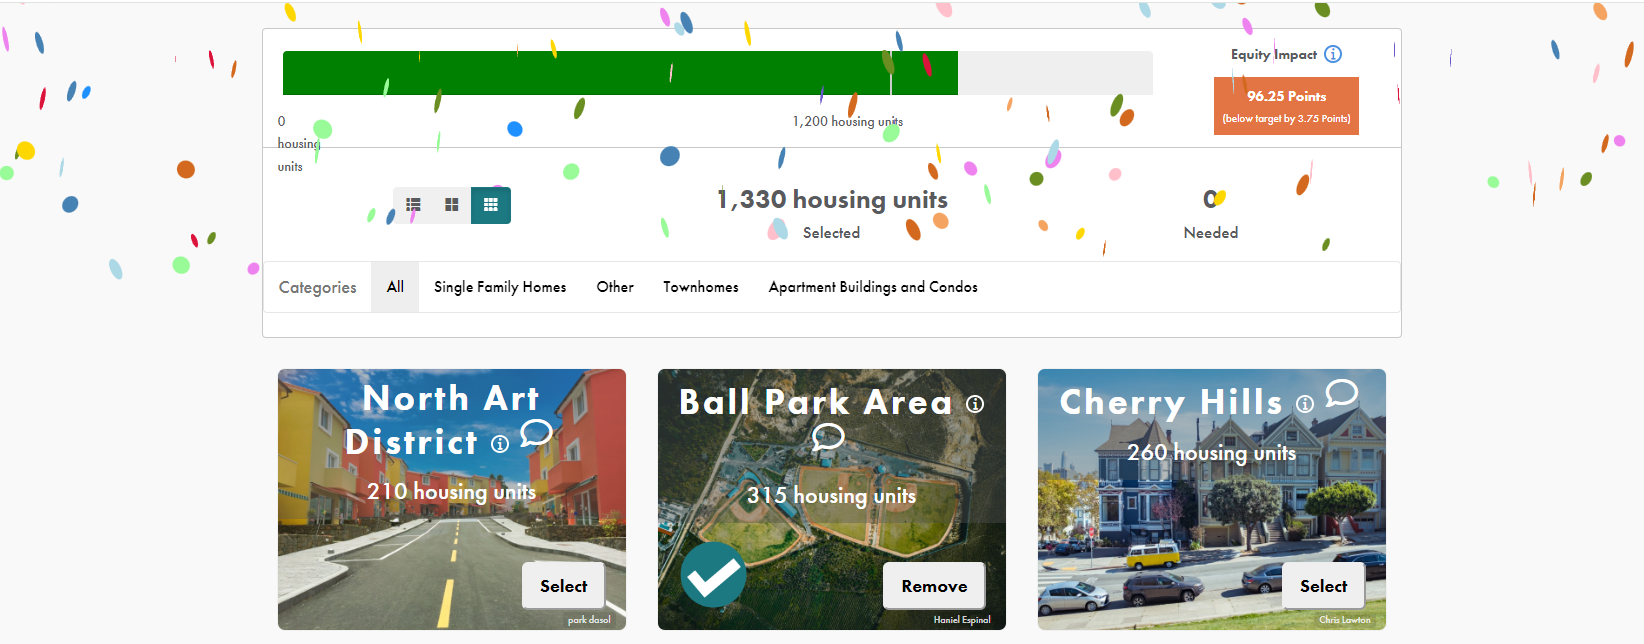
In this prioritization, we’ve used the following settings:
- Default view mode: Small tiles
- Preset: Housing
- Balance bar behavior: Meet or exceed the goal
- Show confetti when goal is reached
- Numbers represent something other than money
- Number suffix: housing units