
Once you’ve logged in to your account, click on “Simulate” in the left sidebar and then "Create Simulation" on the right.

In the modal that appears, give your simulation a name, choose the language, and select the desired simulation mode (Budget or Housing). You can opt to duplicate an existing simulation, use a template, or start from scratch.
Once you have created the simulation, you will see a screen with tabs for "Revenue" and "Spending." Click one of these and follow the next instructions to either upload your data individually or in bulk using a .CSV template.
Entering Data
The most common way to get your initial data into a simulation is by importing a .CSV file that you create from your budgeting software or spreadsheet. In almost every case, you will have much more data at a finer level of detail than what you ultimately present on the simulation, so you will have to roll data up into the simulation’s category/subcategory structure.
For an in-depth walkthrough on adding content to your simulation, watch this short 4-minute video.
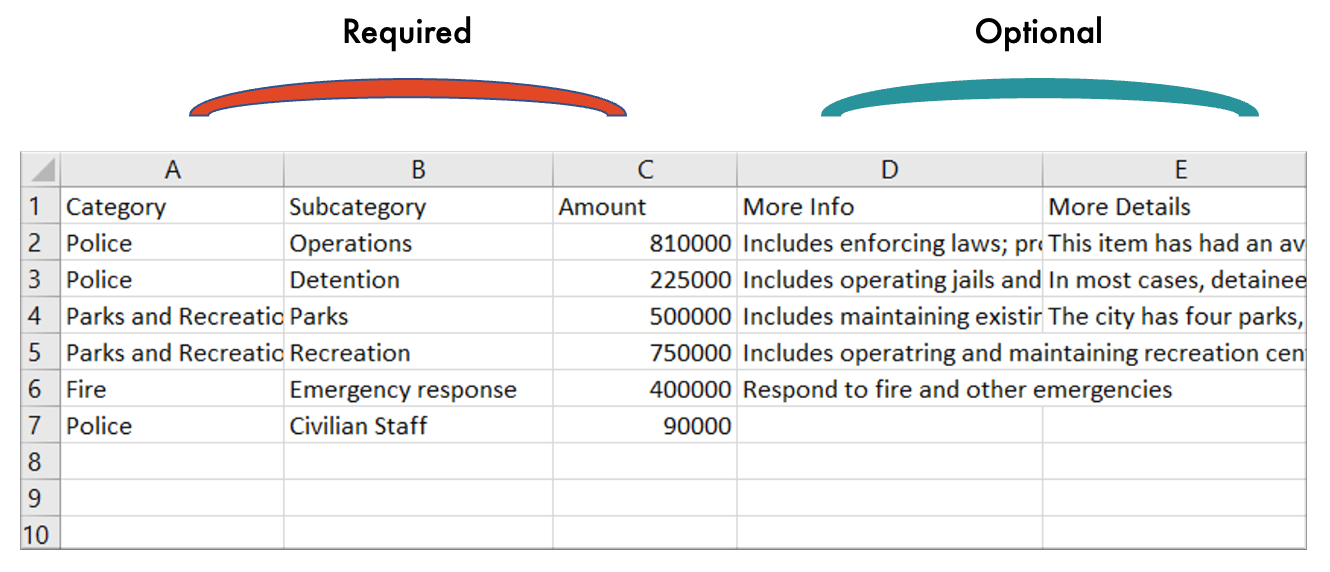
We suggest downloading the CSV Revenue/Spending Template (you’ll see a corresponding link in each section), which will ensure that the data is formatted appropriately for import. For more information about where the CSV fields translate to the simulation that end users will see, check out this article.
You can also enter data by hand, or edit existing data in the simulation, by simply clicking on the fields and typing:

Consider implementing these content types and/or features in your simulation:
- Adding a suggestion box
- Duplicating subcategories
- Adding impacts
- Creating a Dedicated Funds question
- Enabling multiple select in scenario questions
- Setting up a Guided Tour
Customizing Exit/Entry Questions
From the "Exit/Entry" tab, you'll be able to customize what users see when they first open the simulation, and also when they submit their responses. Use these sections to provide further context on the budget or housing issue/goal, explain how to use the Prioritize platform, or gather information about participants’ demographics, discover where users live, and more.
There will be a set of pre-populated entry and exit questions, but you can also create new questions to suit your project’s specific needs. For more information on Exit/Entry questions, read on here.
Finalizing Settings
Ensure that your project has the right display and functionality settings enabled. You can also customize text strings, disable commenting, and more!
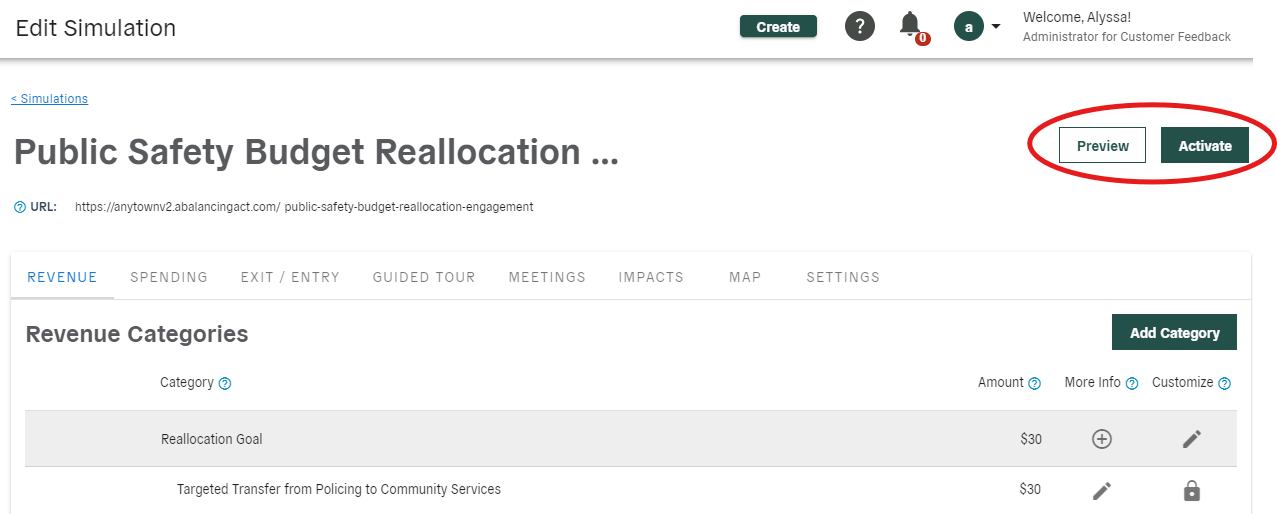
Previewing and Activating
Once you have revenue and spending data in, you can preview your simulation. This is an unpublished link that you can share with others to get input.
Feel free to customize the simulation’s URL if you like, to make it easier for users to access.
When you are ready, click activate! Your simulation is now live and you can share the link with your audience.
If you need to edit anything after activation, read this article for important info about how to do so without overwriting content.